02 12

My Recent Posts

Showing posts with label monogram. Show all posts

Thursday, November 6, 2014

Mud Room Makeover

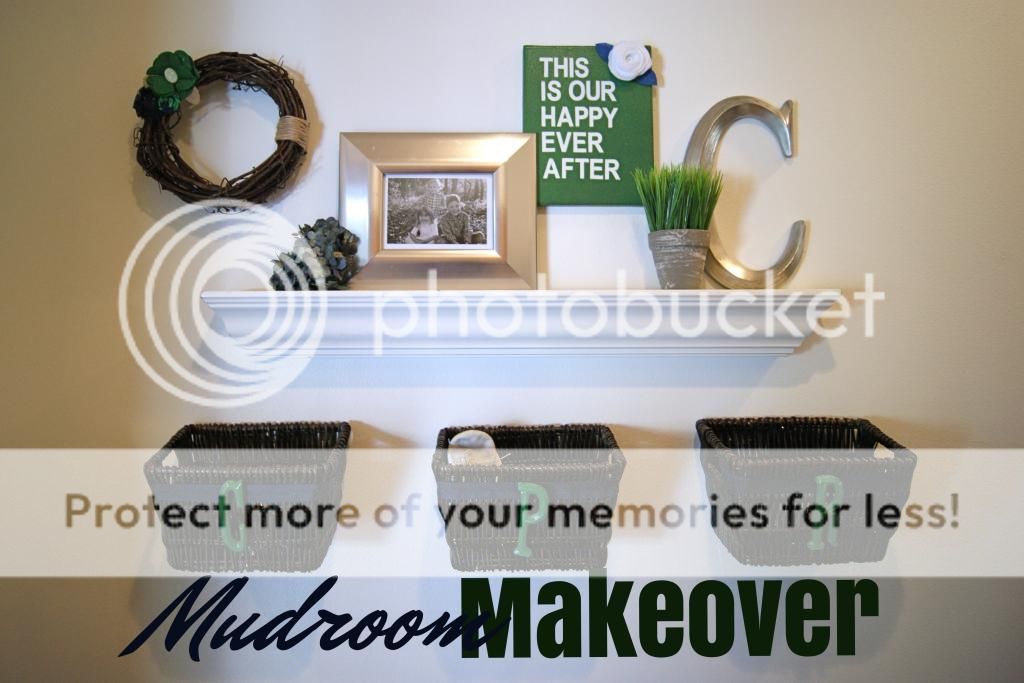
Since we moved in six years ago, my mud room has always been a room I needed to give a desperate makeover!  It had dark tan walls, which makes a room with no windows very dark.  I'm so happy with how it turned out, and definitely alot brighter!
Mud Room Makeover

 Well, as you can see, I decided to paint the walls a nice bright white.  As for my accent colors, a kelly green and navy blue really stood out!  For the wall decor, I searched my home for anything I wasn't using, even if that meant painting it.  The large mirror used to be white, which after spray painting, made the perfect piece for my side wall.  The shelf, I happen to come across at Good Will (for some reason, I always grab shelves when I see them).  The baskets, I had, but decided to add a monogram to each so the kids each have their own little catch all.  The grapevine wreath was plain, but after adding some fabric flowers and twine, it fit in just perfect.  And to me every gallery wall needs, a monogram, a quote of some sort, and of course, photos!!


 Those baskets will be so useful!


Monday, October 27, 2014

Burlap Monogram Picture

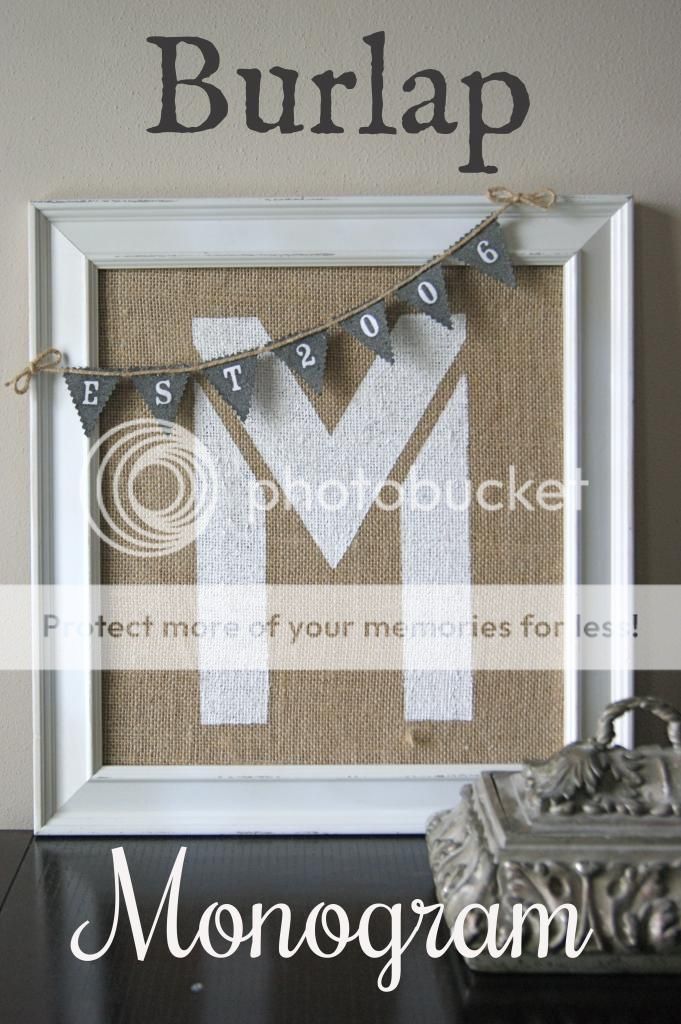
One of my girlfriends had me make one of these for a friend's birthday, and I thought why not share it before I send it on it's way.  Everybody loves burlap and and monograms, why not combine the two into a gorgeous picture like this!  Of course the banner makes it that much more personal by adding the year of your wedding.  
Burlap Monogram

 For the process of making this project, you will need:
1 picture frame
burlap fabric
white fabric
paint colors of your choice
 Start out by taking the glass out of your frame.  Spray the glass with adhesive spray and lay your burlap fabric onto it, leaving about an inch to fold over your edges.  Turning it onto the back side, use your adhesive spray to glue your edges down.  Place your covered piece of glass back into the frame.
With the paint color of your choice, use a large stencil to paint on the monogram.  As for the banner, cut seven small triangles out of your white fabric.  After there cut out, place stickers onto the fabric pieces, reading "EST 20??".  Now that you have your text on, again with the color of your choice, spray paint the fabric banner pieces.  After dry, pull of your stickers, now leaving the white lettering showing.  Use hot glue to glue the banner pieces to a piece of twine.  Add the banner to your frame, and there you have it.  A gorgeous new personalized wall decoration for your home!

Wednesday, September 24, 2014

Fall Twig Monogram

Fall is just around the corner and I was in need of a new decoration for my front door.   As I was trimming down one of my bushes I decided to keep all of the remaining branches to try to come up with a project.  I'm so glad I did, they worked perfect for creating this fall twig monogram for my front door!!  You may have noticed before, I'm a HUGE fan of anything monogrammed!!
Fall Twig Monogram

You like?
The process of making this was so simple and honestly free!!  Can you believe it?  Yes, FREE!!
Start out by cutting your letter of choice out of cardboard.  Next, go out and find your twigs.  After you have your twigs, take one at a time and hold it up to find the appropriate length you need to cover your cardboard.  Use your pruning clippers to cut it off.  Use hot glue to attach it to your cardboard.  Continue this process until the whole thing is covered.  After I was done, I felt it needed a little more depth so I added a second layer.   When it's complete, add a few fabric or silk flowers, a pumpkin, or maybe some wheat?  What ever you want to dress it up a little!  Now how simple was that?  And yes, at no cost at all!!

Monday, July 21, 2014

Burlap Button Monogram

I recently made this for one of my girlfriends weddings, using it for her guest book.  Such a simple projects and turned out so beautifully!!  Who knew some burlap and a pile of old buttons could turn out so gorgeous!
Burlap Button Monogram


More button art!!  It's probable one of my favorite projects to work on.  They turn out so beautiful and elegant looking!  
I found my frame at goodwill, which makes it a pretty inexpensive project.  I covered the backing in burlap and made a template for the letter.  Glueing button after button, eventually it turned into this!!  
You have so many options to match any decor.  I made one for each of my daughters rooms, one in red and one in pink!

Monday, March 17, 2014

Fabric Covered Monogram


So me and my family have up and decided to move to Charleston, South Carolina!!  We haven't found a home yet, but I'm so excited at the thought of decorating a whole new house!!  With that said, I've decided to start making some new home decor.  Lately I've been loving this peachy, coral color, so without knowing where it will go, I thought I can always find a spot for a wood monogram letter.  To start off, I painted the letter coral, took the "C" and turned it upside down and traced it on my fabric.  After cutting it out, I covered the letter with mod podge, laid my fabric on and put another layer of mod podge over the top.  After it was dry, I added some fabric flowers to dress it up a bit.  I know I'll be able  to find it a perfect spot in my new home!!


Monday, January 20, 2014

Moss Covered Monogram


So I had posted this monogramed moss letter a while, but I decided to give it a makeover. Mine was about 4 years old, outside in Wisconsin, it kind of did a number on it!  To start out I took some foam to use as my structure.  After cut out, I traced the letter on to my sheet moss, both front and back.  I used long strips to cover the insides of the structure.  Glueing and pining the moss onto my letter.  After it was complete, I added a burlap bow to hang it by!  It sure looks a lot better than it did before!
Order your own online at my etsy shop!

Tuesday, September 17, 2013

Moss Monogram


I saw these on etsy and was just about to order one, when once again, I thought I'd try to make one myself first.  Instead of running out and buying a large "C" from the craft store, I already had a large sheet of foam.  Since mine wasn't precut, I did have to draw out my "C" onto the foam myself.  After my stencil was drawn, I cut it out.  Next, I needed a large roll of sheet moss.  I laid my "C" onto it, and traced it. (Both front and back side).  Cut it out and with hot glue,  attach both the front and back.  You will need to cut out a few long strips to cover the sides.  Maybe add a bow or flower as an accent to your monogram.  They turn out so vibrant and full.  Mine is slightly faded, but it's been on my front door for about two years.  Shows how well they hold up, and that's in Wisconsin (through all types of weather).

Sunday, September 8, 2013

Monograms


 So I might have a slight addiction to anything monogramed.  They're scattered throughout my house.  I guess you could say, I'm proud of my family name!

Thursday, August 29, 2013

Button Monogram


Both of my girls sleep with their button monogram above their bed. For both of them I found a large frame at good will for only a couple of dollars. I did purchase a matting to fit each of them. After removing the glass, I covered it with fabric to match each of their rooms. I sketched the letter very lightly onto the fabric with a pencil, which for the most part actually erases. I've picked up many bags of assorted buttons at flea markets for only a few dollars. I used hot glue to attach the buttons.  At first, I put a single row of buttons and decided I wanted it a little bit fuller, so I kept adding as I went.
Don't feel like taking on the project, order directly at my etsy shop!
Related Posts Plugin for WordPress, Blogger...

Follow by Email

Follow Me On

Loading...

Total Pageviews

Check out all of my pallets!

Google+ Followers

My Etsy Shop

My Latest Pins!

' $(e).html(html); //correct href for images so they point to Pinterest $(function() { $('.rssFeed a').each(function() { var href = $(this).attr('href'); $(this).attr('href', 'https://www.pinterest.com' + href); $('.rssFeed img').attr('nopin','nopin'); }); }); }; })(jQuery); })(jQuery);

My Etsy Shop

Where I Contribute

This Silly Girl's Life

Grab My Button