My Recent Posts

Sunday, September 29, 2013

Burlap Ghosts


This weekend my girlfriend (knowing me all to well) forwarded me a picture and link to these adorable burlap ghosts.  They were from knockoffdecor.com .  I LOVED them!!  But I have to admit, I cheated terribly, as far as how much work these were!  The tutorial attached to the link was a lot more complicated.  So I took off for the store to buy the makings as she instructed.  That's when I came across these pre made ghost lights.  I found mine at Target.  As you can see in the picture, they already had a white sheet over the top of the light, and a face already on them!  
At this point, you might be wondering, why change them at all?  But, their just so much cuter with the burlap! 

 I ripped off the white sheet, just leaving the ghost face lights. I then cut out my burlap squares about 10 inches wide.  First removing the head, I poked a hole in the middle of  the burlap with the light, and put the head back on.  Bind the burlap,  tie a twine bow and draw on some eyes to finish them off.  

Now what do you think?  So much cuter, Right?


Thursday, September 26, 2013

Glittered Reindeer

So my dad stopped by the other day with a trunk full of old lawn ornaments from my grandma and grandpas yard.  A lot of gnomes, angels, little kids, not much to my liking, but I thought there might have been some hope for these ceramic deer.  All three of them started out brown.  After I had already spray painted two of them silver, it dawned on me to take a picture.  So after painting them silver, I gave them a coat of Mod Podge and immediately sprinkled them with silver glitter.  At Christmas time, I'm sure they'll find a lovely new spot in my home!


Monday, September 23, 2013

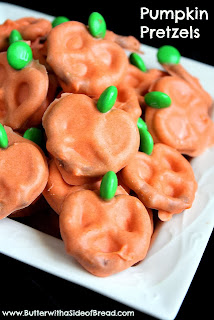
My Favorite (Simple) Halloween Treats

As I was searching the web for a few new Halloween treats for school this year, I came across so many adorable ideas.  A few (as cute as they were), were a little to complicated or to time consuming for me.  After narrowing my list down, I thought I'd make it real easy for you and share my list!

Tuesday, September 17, 2013

Moss Monogram


I saw these on etsy and was just about to order one, when once again, I thought I'd try to make one myself first.  Instead of running out and buying a large "C" from the craft store, I already had a large sheet of foam.  Since mine wasn't precut, I did have to draw out my "C" onto the foam myself.  After my stencil was drawn, I cut it out.  Next, I needed a large roll of sheet moss.  I laid my "C" onto it, and traced it. (Both front and back side).  Cut it out and with hot glue,  attach both the front and back.  You will need to cut out a few long strips to cover the sides.  Maybe add a bow or flower as an accent to your monogram.  They turn out so vibrant and full.  Mine is slightly faded, but it's been on my front door for about two years.  Shows how well they hold up, and that's in Wisconsin (through all types of weather).

Sweater Pumpkin


Again, as I'm preparing more fall decor, I decided to give these sweater pumpkins a try.  Turned out they were very simple.  Start out with a old sweater at the back of your closet.  
First off, cut off the entire sleeve to give yourself a little less fabric to have work with.  Next, turn the sleeve inside out.  At the very end of the sleeve, tie a knot.  Now, turn your sweater right side out leaving your tied not inside the future pumpkin. Stuff the entire end portion of the sleeve as full as you can, until you can form it into somewhat of a ball shape.  


Once into a ball, tie the top with a piece of twine.  If you choose, you can also add a few cross ties, to add to your pumpkin shape.  Very tightly, wrap your twine about one inch up to create your stem.  Once your stem is finished, cut all of the access fabric off.  If you have some type of wired twine, you can add a few spirals.  Just another, inexpensive fall decoration!

Sunday, September 15, 2013

Chicken Wire Cabinet Door


This weekend I stopped in at our local Restore.  I saw this old cabinet door with chicken wire backing.  I just happened to be needing some type of pin board for my craft room.  This was exactly what I had been looking for.  All I did was give it a fresh coat of white paint, sanded it down a little, and now I have the perfect place to hang my notes!

Polka Dot Burlap Bunting


Today I thought I'd share this polka dot burlap bunting I made.  Starting out with a regular tan burlap, I cut out your typical bunting style triangle.  A pinking sheers giving me that jagged edge I was looking for.  Using spray paint, I painted them a variety of colors to make a few different strings.  After they were all dry, with a small circle sponge, I simple added some random polka dots to dress them up.  To finish them off, I hung the triangles on some twine and attached them with small clothespins.  They look really cute in children's room, and are another great gift idea for new mom's. 

Wednesday, September 11, 2013

Burlap Jars


Over time I pick up old of unique jars if a come across them.  Dressing them up with a little burlap, lace, twine or ribbon can add so much.  After I was done, I felt they still need a little something else.  My jar of old vintage jewels came to the rescue again.  They added the perfect touch.

Chalkboard Lazy Susan


Not a big project or anything but, I thought I'd share the idea!  Again as I'm writing all these posts, I'm noticing my fix with chalkboard paint.  Maybe a bit much, but it's just so cute and yet functional.  At Goodwill the other day I spotted this lazy susan and decided to give it a coat of chalkboard paint.  How nice will it be to label your treat right on the lazy susan itself!

Crackle Pumpkin


Back to fall again, I wanted to bring a touch of it into my living room without using bright tacky orange pumpkins.  I did happen to have a few of those pumpkins sitting around so I thought I'd give one a makeover.  To try to give the pumpkin a crackle look, I first of all, painted it with elmer's glue.  After drying for a few minutes and felt a bit tacky to touch, I painted it aqua.  When the pumpkin was completely dry it had a perfect crackle finish.  Aqua pumpkin, I little out of the norm, but it'll match with a nice aged look!

Christmas Sled


As I'm in Christmas mode, I decided to take on this sled.  I've it for ages, but it was kind of neglected and I new it had such potential.  First off, I painted a dark red to match our front porch.  We had a pair of small ice skates sitting around which I know would be the perfect addition.  After putting on some Christmas greens, I finished it off with a large burlap bow.  Really, what doesn't need a burlap bow?

Fall Chalkboard


As fall is approaching I decided to change up my chalkboard.  Yes, my chalkboard print could use a little help, but It'll do just fine!  I went with the "Give Thanks" saying and added a pumpkin and some leaves to spruce it up.  It'll be the perfect addition to my dining room  fall decor.

Chalkboard Acorns


As I said I've been trying to get ahead with some Christmas decorations, I've been trying to do the same thing with fall.  Online I saw a similar version of these acorns, but a lot larger version.  I just happened to come across these wood eggs at Goodwill that I thought would work perfect for this project.  I started out by painted the top half with chalkboard paint.  I  wrapped the bottom in twine using hot glue to secure it.  I simply added a small twig for the stem to finish them off.  I loved the way they turned out, and all for only $1.00!

Sunday, September 8, 2013

Monograms


 So I might have a slight addiction to anything monogramed.  They're scattered throughout my house.  I guess you could say, I'm proud of my family name!

Pearl Nest Necklace

A while ago, I saw a necklace very similar in a magazine that I had received.  But as usual, it was expensive, and I instantly think "I can make that"!  I had some thin silver wire and also had a few small white beads.  I started by putting the white beads though the wire and winding the wire in a circular motion around the beads letting them show in the middle. When I felt it was full enough, I bent a small piece of the wire over another to secure it!  On ebay, I was able to find 100 plain silver chains for only $10.00.  Granted, I will probably never go through 100 chains, but it was a really good deal.  I've also made a lot of these for gifts for all of my new mommy friends!

Succulent Mug


Succulent plants are so popular right now, easy to take care of, and so darn cute!  I saw few mugs at Good Will for only $.50 and thought, how cute would those be with a little succulent plant?  I had made one for myself, and thought what an easy little thank you gift.  I simply added a small chalkboard and burlap flag to read "Thanks".  Only costing me a few dollars and the recipient just loved it!

Saturday, September 7, 2013

Christmas Pillow


 I know it's only September, but every Christmas when I get all of my Christmas decorations out, I'm always frustrated that I don't have enough stuff.  Or at least that I like.  So threw out the year I've made it my goal to pick up some new things, as well as make some new decorations.  When Christmas comes, I'll be ready!  So my project on this rainy day was to make a Christmas pillow!  I had a plain brown pillow that I picked up at Goodwill a while ago.  I'll try to walk you though my process.  To start, I printed out a silhouette of a reindeer that I found online.


Next, I cut out the reindeer! As you can see, my pillow was only $2.99.  It was new with tags.  What can't you find at Good Will.
I laid the cutout centered on the pillow.  I took white paint and while holding the edges down, worked my way around the stencil.  I did go back and apply a second coat to cover some light spots. Right now it looks out of place, but come Christmas, it'll fit right in!


Related Posts Plugin for WordPress, Blogger...

Follow by Email

Follow Me On

Total Pageviews

Check out all of my pallets!

Google+ Followers

My Etsy Shop

My Latest Pins!

' $(e).html(html); //correct href for images so they point to Pinterest $(function() { $('.rssFeed a').each(function() { var href = $(this).attr('href'); $(this).attr('href', 'https://www.pinterest.com' + href); $('.rssFeed img').attr('nopin','nopin'); }); }); }; })(jQuery); })(jQuery);

Where I Contribute

This Silly Girl's Life

Grab My Button